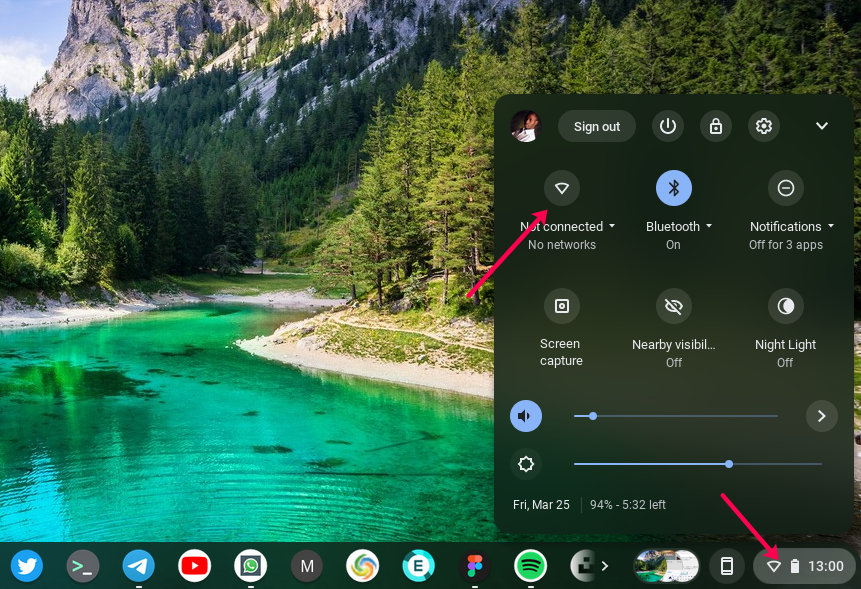
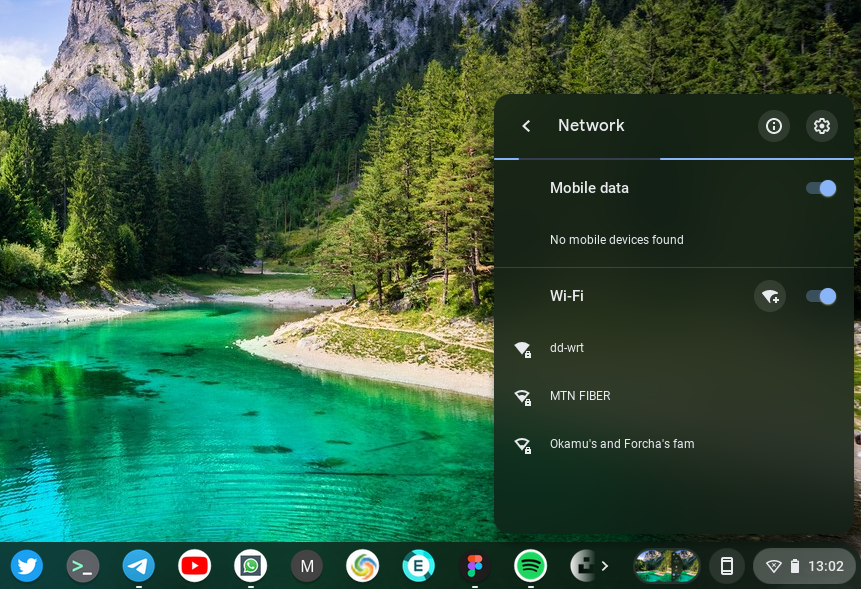
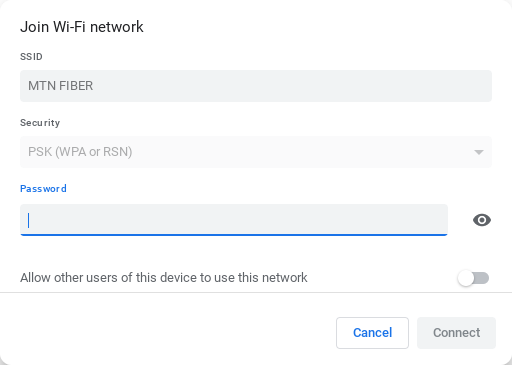
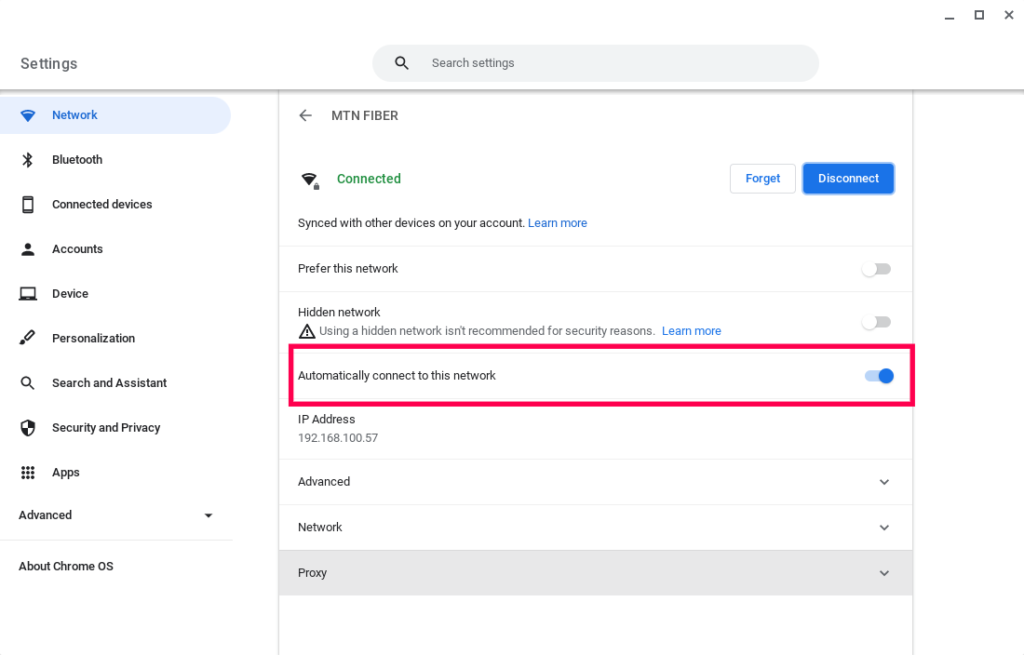
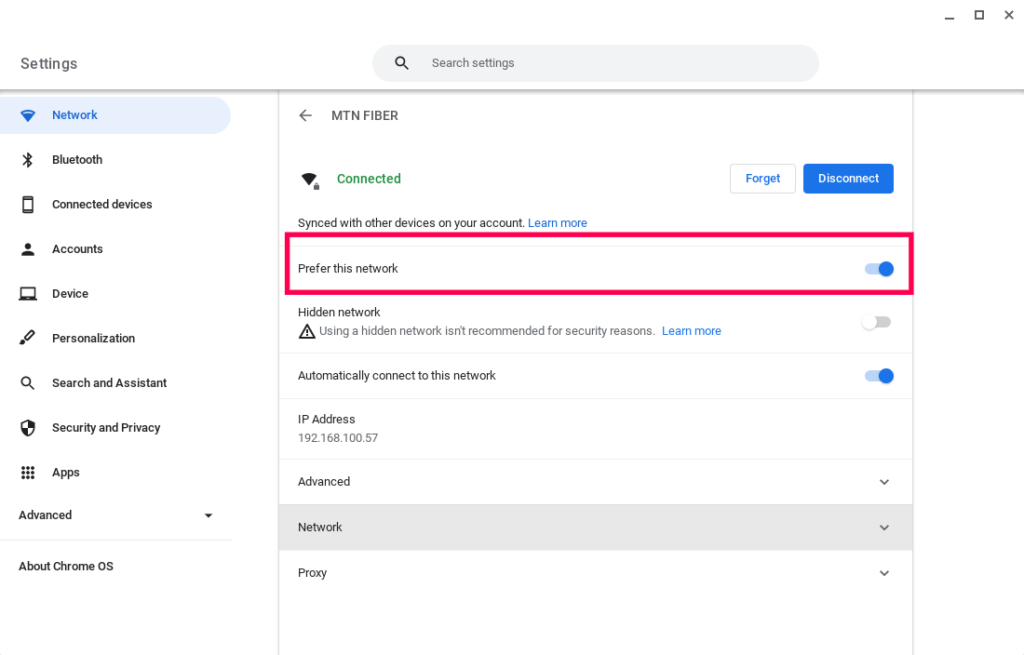
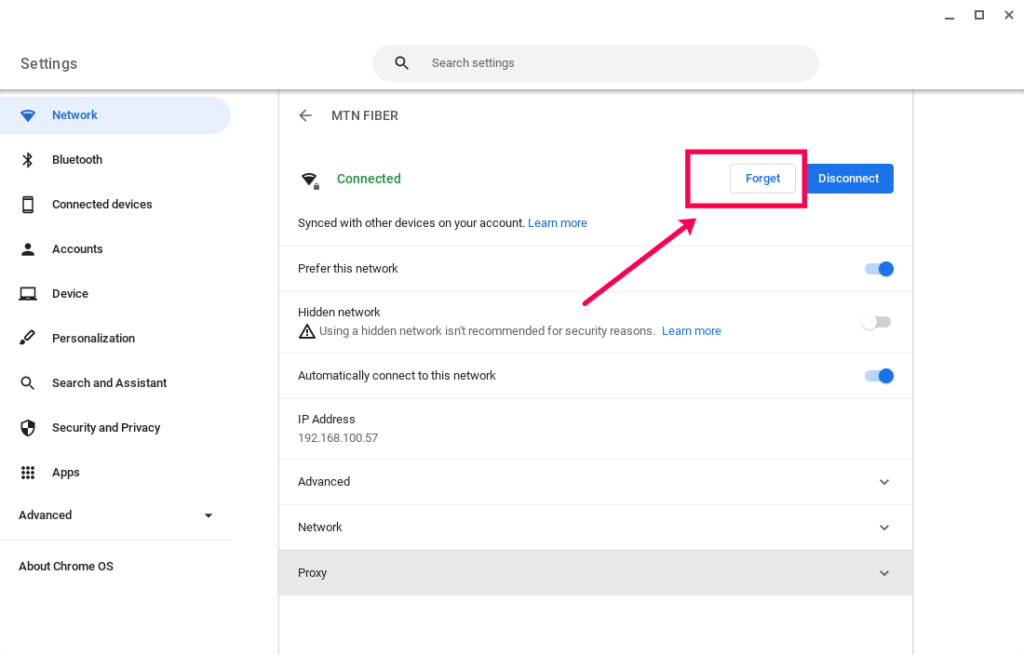
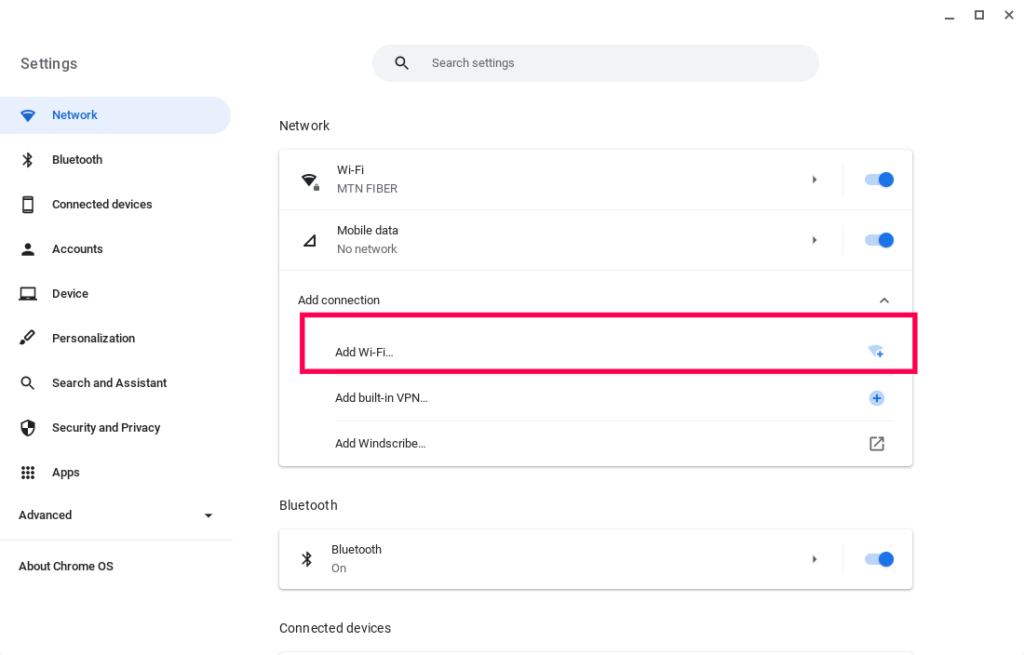
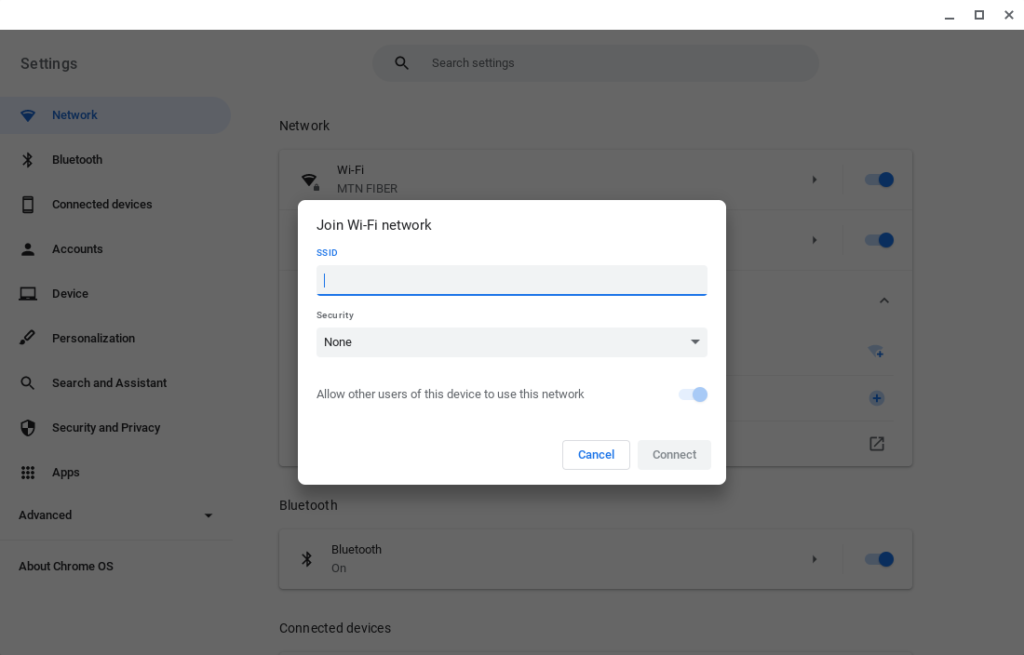
To connect to WiFi, click on the system tray or time on the bottom right corner. Turn on WiFi by clicking on the cone icon. Your Chromebook will start scanning for available WiFi networks within range. Select the WiFi network name you wish to connect to. You’ll be prompted to enter the WiFi password. Enter it. You can choose whether other users on your Chromebook can connect to this WiFi network. Now you’re connected to the internet. You can set Chrome OS to automatically connect to this network next time you login. To do that, go to Settings > Network > WiFi > Select the WiFi network > Automatically connect to this network. If you have several WiFi networks, you can tell your Chromebook which one it should always connect to. This setting is called preferred network. To set your preferred WiFi network, on the WiFi name screen, turn on “Prefer this network”. If you no longer want to connect to a specific WiFi network, the easiest way is to reset its WiFi password. To do that, under the WiFi name, simply click on “Forget” button. You’ll be disconnected from that WiFi network. You can also connect to a hidden WiFi network. A hidden wireless network is a wireless network that isn’t broadcasting its network ID (SSID). So it won’t appear under a list of scanned WiFi network when you click on the system tray. Connecting to a hidden WiFi network requires you to know its WiFi name or SSID and Security protocol. To connect to a hidden WiFi network on your Chromebook, go to Settings > Network. Collapse the Add connection tab and select Add WiFi.
